This month for Science Club we explored the human body.
First, here's a link to the basic format for Science Club. It explains how we generally plan and run things.
Described below are activities families brought for our theme. Most of the pics were taken at Science Club, but a few I took at home of the activities I brought. It's hard to focus on working with kids and taking pictures. I need to hand off my camera next time.
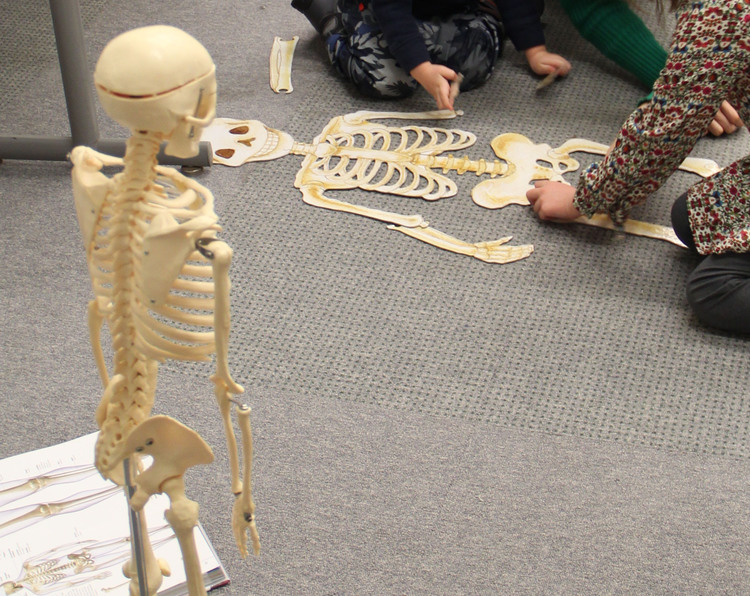
For the skeletal system we had a floor puzzle, skeleton model, The Human Body Book with a skeletal system page opened, and a light box with broken bone x-rays.
For the floor puzzle, kids liked putting it together, then lying next to it on the floor to see if they were taller or shorter. I like how the bones are labeled on the back of each puzzle piece.
For the skeleton model, kids wanted to see how the skeleton arms & legs move.
I didn't see anyone use the Human Body Book page with the skeletal system. That's ok. It was available if anyone was interested. By the way, this is my favorite all-in-one human body book. It's a mammoth for little hands but a good one to page through together.
The broken bone x-rays weren't taken much notice of. My plan was to let kids find breaks and fractures in the bones, then find those bones on the skeleton model.
The light box wasn't bright enough for the light room. If we would have turned off the lights and made a special time of it, that would have gotten their attention. The room didn't have windows, so that would have worked. The light box is just a clear container with white lights inside. There's a piece of white paper taped to the lid so the individual lights aren't as noticeable. It works great in a darkened room.
For this area, we shaped play dough into organs. One of the kids ran up to his mom to show the pancreas he made! Wish I got a picture of that.
For logistics, we covered the floor with a clear table cloth. The play dough is a homemade recipe. The organ cards are an inexpensive printable. The book is Organs! How They Work, Fall Apart, and Can Be Replaced (Gasp!). I like the illustrations because they're simplified which makes them easier for little ones to see the parts. It's also been helpful for my sketches of the organs.
Here kids learned about digestion. They were given a handful of cereal and squished it in their hands to represent how our teeth chew food. They put the cereal down the toilet paper roll, representing the esophagus, and it fell into the bag filled with vinegar, representing the stomach and stomach acid. They learned how long food is typically in the stomach, and small and large intestines.
For the circulatory system, each child made a model of blood and got to take it home.
The plasma is water with yellow food coloring, the red blood cells are Red Hots candy, the white blood cells are uncooked lima beans, and the platelets are uncooked rice. I can't find the original post where I got the idea for the candy, beans, and rice. I remember one site suggested adding bacteria so the white blood cells could attack. I like that idea but not at the library.
The jars are spice jars from Penzey's. I used white address labels to write the blood contents on the side. I wanted something the kids could take home and think about later. The only thing I'd do differently is use something red other than Red Hots. They work for the demonstration, and I like how they dye the water red, but I'd prefer something that would last at least a week to keep referring back to.
Kids listened to their heart beats. I have a nurse friend who let me borrow two stethoscopes. The kids' faces lit up when they heard their own heart beating; it was so sweet.
As far as logistics, we used alcohol wipes between uses to keep the ear pieces clean. And because of the room noise, we went into a quieter side room for this. If a child had a hard time hearing their heart, I had them do some jumping jacks.


